The new Materials feature has added in a number of new features- one being more control over alphas. We've only been asking for the ability to use 1 bit alpha masks since....the introduction of the stupid alpha flicker issue so, that's, what, 7 years? I don't even remember. It's been a long time. But we have them now, finally.
In the Texture panel in Build, there are more dropdowns and thingies now. Right now, we are interested in Materials, Texture (diffuse). Under that, Alpha mode, and the dropdown there gives us options, huzzah. Note: make sure you've selected a texture face with an alpha (transparency). No alpha, no options.
None just turns off the alpha channel, as if you uploaded a solid texture, no alpha channel at all.
Alpha blending is the default for textures with an alpha channel. This means an 8 bit alpha mask, gradual alpha transparencies with gradients, the old potential alpha flicker issue. They added an option in the Develop menu that would turn this "off" (make them 1 bit) for all alphas that were also set to 0% transparency a few viewer iterations ago, Develop>Rendering>Automatic Alpha Masks (non-deferred). THAT IS STILL THERE. THIS CAN SCREW STUFF UP. If that is checked, which it appears to still be by default, even if you have it SET to use 8 bit transparency, it won't- if it doesn't feel like it. Here's the fun part, kids, it used to always just set it to 1 bit, now it seems to decide for you, and it may not decide the way you want to. To force it to use 8 bit transparency, up the Transparency % to 1%. It's such a small bit you won't see it, but it will force it to use the alpha properly. Why is this a deal? Because any gradual transparencies will no longer be gradual. It will be on or off, sharp edges, no transparent glass or soft edges or shadows- when it decides you shouldn't have them. This is also a deal because it's set on the viewer side, NOT server side- so while you can set it in your viewer to show things the way you want, that doesn't guarantee what other people will see. And because it's viewer side, there's no way to really know where the cutoff is for everyone (especially once you get into the whole mac vs. windows vs. linux thing). Bright side? It does actually seem to be smart about it now, whereas before it just destroyed everything.
But! Now we have another problem. Full bright no longer consistently works on alpha blended textures- even ones the deferred rendering makes solid. For some people, it is never full bright, ever. For me? It is sometimes, and then not others, which is extra fun! Generally it is renders fullbright to begin with (but doesn't even always start out full bright), it will cease to once I select it, and stay that way until I reload the object entirely (tp out and back in, relog, etc.- toggling the Automatic Alpha Masks also seems to go back and forth between full bright and not, turning non-deferred on kills full bright). If you have alpha cutout vendors, this is a problem. One that you will want to fix by using Alpha masking instead- but you sacrifice all gradual transparencies once you use that.
Alpha masking is 1 bit transparency. This means everything is on/off, no gradient transparency. Thankfully, it isn't entirely pixel by pixel based, but will smooth out your angled lines on the cuts- just like Automatic Alpha Masks (non-deferred). Things that already used this are the avatar- alpha masks, and the edges of the system skirt when you had anything with a transparency- and system plants. Upside to this? No more alpha flicker! That's why we've wanted it forever! Also it's a little easier on the system in general, so it's a good idea to use it if you can get away with it anyway, but your alpha edges will be harsher, and smoothed angles still may not be actually straight, but may be lumpy. Still, full bright with alpha masking seems to work properly for everyone!
There is a slider under Alpha masking for Mask cutoff. This defaults to 0. Defaulting to 0 is stupid. That is just the same as setting it to None for the Alpha mode, it's solid. What you will almost always want is 127, that is the center of the range. Lower means more will be solid, higher means less will- if you have a haloing problem with your alphas, you'll probably want to set that number higher, possibly as close to 255 as you can without moth eating chunks in the middle unevenly. And you'll want to learn ways to avoid that haloing issue, see my previous post for some tips on that (though for solid cutouts, which is what you need here, taking pictures huge with antialiasing off, and shrinking after you've cut them out from the background will work, so long as you fill the empty background with something like the solidify filter with your alpha channel in an actual channel).
The last option is Emissive mask. This also turns your texture entirely solid. Full bright also completely destroys this option, because what it does is choose WHAT to make full bright. The solid parts of your texture will be fullbright- the transparent parts will be rendered with the surrounding lighting! It does not do gradual transparencies well/at all, and you can't adjust what it sees as solid/bright, so make sure you have a VERY clean mask before using. This and None are the least backwards compatible- it will just show the regular alphaed out texture if you are using a viewer without materials, both currently show no alpha, but also no emissive fullbright area, on a materials viewer with Advanced Lighting Model off.
Wednesday, June 26, 2013
Friday, October 26, 2012
Perfect alpha cutouts
Getting something cut out of a background in SL perfectly can be difficult and frustrating- unless you know the trick of it. Many people use the green screen trick, but you can have slight acid green bleed in your semi transparent areas, like hair whisps.
First requirement: you need to be able to take at least 2 completely identical pictures, aside from background colour (if there are flexis, you might want to turn them off after you've gotten everything into position, including your camera- Advanced menu>Rendering Features>Flexible Objects. This CAN be optional, your flexis might not move so long as nothing moves...but then again, they might, depending on settings and conditions)- and you need to be able to change that background colour.
Take one picture with your background solid fullbright white. Take a second picture identical but for the background being solid black. Optionally, take a third (or more) with the colour a general match for the touchy alpha issues- a vague match for your hair, any semi transparent spots, etc.
In Photoshop, one of the layer styles is "Difference"- copy paste the black or white background over the white or black background, and set the top layer to that. The image will be all black and white- the background will be white, everything else in the shot will be black, with perfect alphaed edges for cutouts. Select all and shift-copy, paste that into a channel mask for the image, and invert it, so it's a white outline on a black background. If your picture has shadows, you probably WILL still have to clean this up in minor ways, due to lines and shadows rendering differently on different backgrounds- make sure the places that should be solid are white, with no grey spots from shadows not rendering quite the same, and if you're taking larger than screen size, the line problem will have to be fixed. If you're not taking it with shadows on, your mask is already perfect- aside from occasional minor shiny glitches, so you might want to zoom in on those and make sure they're all white!
If your white and black aren't quite 100% pure (which can happen, even with fullbright- especially with shadows and Windlight), you may need to adjust the levels of your mask ever so slightly pulling the end arrow in to the center a tad. You should not need much, if you need this step at all- but you can have a slightly messy background mask that is mostly, but not 100%, transparent, under some circumstances (i.e. SL having a bad day).
Now, you can use this mask on your white background picture, your black background picture, or the picture(s) with the alpha colours. This last option works best- if you have multiple problem spots, layer them all only showing the bits you need where to prevent the colour bleed (if you're scaling the picture down, the colour bleed may disappear, depends on how much of a stickler you are as to how much effort to put in here- it's going to be minor even if you just use the white background version). If you have antialiasing on, there will be VERY slight bleed over the entire outline, so if you're wearing black, might want to do your cutout on the black background copy (black halo can also be less immediately noticeable than white, "shadows" rather than "halo"). But whatever you decide to cut out, use that channel mask for your selection or mask for your cutout!
Wednesday, September 19, 2012
Lining up LODs
This is a prime example of why a public jira is a VERY GOOD THING. I would have been thoroughly perplexed by the entire problem AND would have taken much longer (if ever) finding the solution without the ability to browse preexisting jiras for this problem. (I made an assumption that was incorrect, because it made logical sense to work that way, and no logical sense to work the way it does. And computers are all about logic, right?)
The problem: you can upload multiple separate mesh objects at once into one linked object (this is great for, say, everything already being in the right place instead of having to line shit up! Hooray!). HOWEVER, when one does this and attempts to also upload your own custom LODs and physics shapes, the objects do not always line up! This leads to lower LODs being wacky shapes, or just plain saying "nope, not doing it" if you don't have the same material setup on them all (texture faces). So....you can upload multiple items and have them all in the right places in respect to each other OR you can have control over your LODs. Not both. (As an aside, the auto generated LODs seem to trim off the objects semi randomly- sometimes one object will get the LOD jacked down a lot, and the other will be barely touched, it doesn't seem to do it evenly.)
The Real problem: the collada exporters just randomly decide on an order for your objects in the file, not based on order selected or any other criteria over which you have control. This definitely holds true for the blender 2.62 exporter- but it is not alone, other programs also have this issue.
The solution: reorder your collada file by hand. First step, in your modeling program, before exporting, name all your objects useful names. You need to be able to distinguish what is the same object in different LODs by name only, so keep that nice and consistent! Export your collada file now that everything is named and easy to tell apart blind. Use a basic basic text editor (WordPad works perfectly), open up your dae file. It's a bunch of xml code in there, nested <type> <subtype>. Now, you're on your own here a bit, because collada files vary WILDLY in what they call things and how they're ordered.
There's going to be material data in there (probably), which you can just skip by. You're looking for geometry or something similar. In my current exporter, I'm looking for <geometry id="object_name" name="object_name"> (Note: those names don't have to be the same, and they are things you set, so you should know what names you're looking for). There will be a bunch of nested attributes, and then a close geometry tag, and then another open tag with a new name for the next data block. Find out what order your data blocks are in there! Then open up another LOD file, scroll down to the same geometry blocks, and reorder each entire block into the same order as the first file- repeat for all LODs (the ENTIRE block needs to be moved, from start to end tag for an object). Save the newly reordered files (just as text, don't let it do anything fancy, don't rename from .dae). Now they should line up so the objects agree across LODs instead of randomly assigning!
Saturday, September 15, 2012
The Arcade

It's been forever since I've posted anything here, and even longer since a tourism update. I want to do those more often (I've been preoccupied with moving and a broken thumb and too many events and an occasional fashiony blog- I haven't BEEN much of anywhere a lot lately).

This time, I'm cheating. Because, you see, I got in early because I'm a participant, so I have pictures that aren't crammed full of eleven jillion people (or, you know...30. whatever the avatar limit is). The Arcade!

Aside from the actual, you know, the spendy money on awesome things reason to go, the venue is amazing. It's an enclosed skydome, with an entire planned environment separate from everything else.

It is, as you can probably tell from looking, pretty much 100% mesh. Mesh really does open up possibilities that were unavailable previously- sculpts helped (a LOT!), but mesh is much more flexible with efficiency and texture management. (I'm also lucky/spoiled and can run with shadows on all the time on this computer, so I do, oh, how I do.)


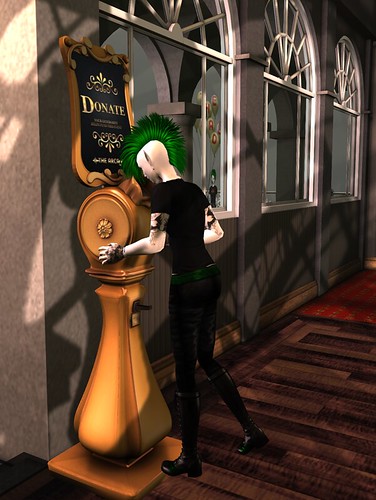
You super duper want to sit on a donation kiosk, whether you toss any money their way or not. Make sure you've got default camera (hit escape a couple of times).


Sunday, February 19, 2012
New Math
With meshes, we now have 2 ways to calculate prim count, old math (one prim = one prim), and new math (one prim = however many land impact prims depending on a number of variables). Any linkset linked to a mesh always uses new math (just one mesh in a linkset will force new math for the entire linkset, always). But you can choose to use new math on a linkset of traditional and sculpt prims as well.
But do that with care! There are reasons to do it, and reasons not to. Biggest reason to? In new math, a single prim can count as HALF a prim in a linkset, so one linkset of prims can be half the number of actual prims. Link six boxes and use new math? 3 land impact prims. (Note: this always rounds up. 5 prims will also be three prims, 7 prims will be 4). THIS ONLY APPLIES TO STATIC PRIMS. THEY CANNOT BE SCRIPTED OR PHYSICAL. It's a bonus modifier we get applied to "simple" prims, those that impact the server less.
However, new math is not straightforward like old math. There are 3 variables, and you have to figure out how to juggle them. Some people are just telling people to set entire linkset to Convex Hull and watch the savings: but if you don't have the right things in your linkset, your prims will count as MORE, and you may not be able to walk into your buildings anymore!
There is an easy way to find out what things will cost, and if it's worth trying (AND how to fix the not being able to walk into places problem). Click on the "More info" link to find out what your object will cost (it can take a bit to calculate though!):
 That will bring up this second menu with all your infomation. The thing I currently have selected is 3 prims. The three things that make a difference to us for prim count are Download, Physics, and Server. This Features tab, with the Physics Shape thing? That's where you need to set Physics shape to use new math. If all prims in a linkset are traditional prims, and use Prim physics, that linkset will use old math. If ANY prims in the linkset are set to either of the other two options (Convex Hull or None), the entire linkset will use new math- this is how you set non mesh prims to mesh math.
Download is how complicated the object is. It calculates by number of faces and size, complicated prims have more faces. Aside from replacing prims with less complicated ones, or shrinking prims, or removing complicated prims from the linkset entirely, we can't get this number any lower. Sculpts are a MINIMUM of 1.3 Download, even tiny, even with faces thrown away in the sculpt map (that, in fact, doesn't seem to have any impact to sculpt calculation ever- sculpts seem to have a flat calculation, regardless of the sculpt). And they go up from there. Linking 2 sculpts together will become 2.6- which will count as THREE prims. So only use sculpts with new math if you can balance the cost with other prims! Sculpts and toruses and spheres and tubes- anything other than boxes and prisms (and how often do you use a prism?)- can cost you, depending on size and complexity, they can cost too much. Boxes are cool. Boxes are 0.1, even at 64mx64mx64m, hollowed (even circle hollowed) and cut! (NOT twisted. Twisted ads a very substantial amount more to it, because it requires many more faces for the twist.) So, say you have a linkset with a bunch of boxes and a sculpt? You may find you can link that together and use new math and prim count goes down. But you may not.
Physics is where you can really play with your linkset cost. Simple physics (boxes! But not as much cutting or hollowing this time!) cost very little. Complicated physics, especially hollowed or cut things, even boxes, start costing. You can reduce physics cost by making things Convex Hull, but that makes them VERY simple: you will not be able to walk though hollows or cuts, and the actual outer shape beyond that may not be what you expect (it's not straight up bounding box all the time, but sometimes it is). You can reduce physics further by setting SELECTED PRIMS IN THE LINKSET to None. The root prim CANNOT be set to None. Physics set to None works like Phantom: so you can mix Phantom and non Phantom prims in a linkset this way too! Hollowed or cut prims for doorways may have to be set to None (you can set them to Prim so long as the rest of your Physics allows for the calculations). Many sculpts you may want to set to None to take them out of the Physics calculation, as well as not having their physics get in the way. You can set all the prims in the linkset individually to your choice of the three options, and you may need to! These example prims? I need to set my physics to Convex Hull or None to bring down my cost before I use new math, or not use new math at all, as well as linking them together (in practice? The base had to be set as Convex Hull, AND all the linked prims had to be set to None, before I could get the Physics low enough to see enough savings to actually lower the prim count. They are a sculpt and 2 cut tubes, so, complicated- but those cut tubes actually don't cost all that much at this size, so I can get away with it, so long as I don't need proper physics collision).
The last variable here is Display. That will NEVER be less than half the number of prims in your linkset. In this case 3 prims, divided by 2, equals 1.5. This is an unscripted unphysical linkset, so I get the static bonus. If this is equal to the number of actual prims, it's not worth trying to use the new math, because you won't see any savings!
The largest of these three numbers will always be the one used. The land impact number is rounded by linkset, 1.5 will be 2 land impact prims, but 1.4 will round down to 1.
A lot of land impact can be saved if you are smart in how you juggle your physics- and in what you link together! But that large sculpt? You may want to unlink that to leave it using old math and make sure you select it too before you move your thing.
But do that with care! There are reasons to do it, and reasons not to. Biggest reason to? In new math, a single prim can count as HALF a prim in a linkset, so one linkset of prims can be half the number of actual prims. Link six boxes and use new math? 3 land impact prims. (Note: this always rounds up. 5 prims will also be three prims, 7 prims will be 4). THIS ONLY APPLIES TO STATIC PRIMS. THEY CANNOT BE SCRIPTED OR PHYSICAL. It's a bonus modifier we get applied to "simple" prims, those that impact the server less.
However, new math is not straightforward like old math. There are 3 variables, and you have to figure out how to juggle them. Some people are just telling people to set entire linkset to Convex Hull and watch the savings: but if you don't have the right things in your linkset, your prims will count as MORE, and you may not be able to walk into your buildings anymore!
There is an easy way to find out what things will cost, and if it's worth trying (AND how to fix the not being able to walk into places problem). Click on the "More info" link to find out what your object will cost (it can take a bit to calculate though!):
Download is how complicated the object is. It calculates by number of faces and size, complicated prims have more faces. Aside from replacing prims with less complicated ones, or shrinking prims, or removing complicated prims from the linkset entirely, we can't get this number any lower. Sculpts are a MINIMUM of 1.3 Download, even tiny, even with faces thrown away in the sculpt map (that, in fact, doesn't seem to have any impact to sculpt calculation ever- sculpts seem to have a flat calculation, regardless of the sculpt). And they go up from there. Linking 2 sculpts together will become 2.6- which will count as THREE prims. So only use sculpts with new math if you can balance the cost with other prims! Sculpts and toruses and spheres and tubes- anything other than boxes and prisms (and how often do you use a prism?)- can cost you, depending on size and complexity, they can cost too much. Boxes are cool. Boxes are 0.1, even at 64mx64mx64m, hollowed (even circle hollowed) and cut! (NOT twisted. Twisted ads a very substantial amount more to it, because it requires many more faces for the twist.) So, say you have a linkset with a bunch of boxes and a sculpt? You may find you can link that together and use new math and prim count goes down. But you may not.
Physics is where you can really play with your linkset cost. Simple physics (boxes! But not as much cutting or hollowing this time!) cost very little. Complicated physics, especially hollowed or cut things, even boxes, start costing. You can reduce physics cost by making things Convex Hull, but that makes them VERY simple: you will not be able to walk though hollows or cuts, and the actual outer shape beyond that may not be what you expect (it's not straight up bounding box all the time, but sometimes it is). You can reduce physics further by setting SELECTED PRIMS IN THE LINKSET to None. The root prim CANNOT be set to None. Physics set to None works like Phantom: so you can mix Phantom and non Phantom prims in a linkset this way too! Hollowed or cut prims for doorways may have to be set to None (you can set them to Prim so long as the rest of your Physics allows for the calculations). Many sculpts you may want to set to None to take them out of the Physics calculation, as well as not having their physics get in the way. You can set all the prims in the linkset individually to your choice of the three options, and you may need to! These example prims? I need to set my physics to Convex Hull or None to bring down my cost before I use new math, or not use new math at all, as well as linking them together (in practice? The base had to be set as Convex Hull, AND all the linked prims had to be set to None, before I could get the Physics low enough to see enough savings to actually lower the prim count. They are a sculpt and 2 cut tubes, so, complicated- but those cut tubes actually don't cost all that much at this size, so I can get away with it, so long as I don't need proper physics collision).
The last variable here is Display. That will NEVER be less than half the number of prims in your linkset. In this case 3 prims, divided by 2, equals 1.5. This is an unscripted unphysical linkset, so I get the static bonus. If this is equal to the number of actual prims, it's not worth trying to use the new math, because you won't see any savings!
The largest of these three numbers will always be the one used. The land impact number is rounded by linkset, 1.5 will be 2 land impact prims, but 1.4 will round down to 1.
A lot of land impact can be saved if you are smart in how you juggle your physics- and in what you link together! But that large sculpt? You may want to unlink that to leave it using old math and make sure you select it too before you move your thing.
Friday, December 30, 2011
Adventures in Exporting
This is a run down of my personal glitches with the collada exporters in Blender. Your builds may not have the same problems, but I had to stumble around in the dark to find the ways around mine, so if these issues are plaguing you too, might be worth a try. This is not telling you how to export in Blender, or how to use Blender, it assumes you know that already- just that you are having these particular export glitches when doing it.
I primarily use Blender 2.49 (an old Jass build, that's long since not been available for download. It's comfortable for me, it predates Primstar, and it doesn't have some of the other glitches/intentional refusing to do what I want that was introduced that messed up my workflow). I haven't really jumped on the 2.5 bandwagon much yet, 2.49 does what I want, how I want it, and I haven't spent the time to find the way to work around 2.5 (just trying to cam around in it irks me with the new settings, and I haven't spent the time to get used to it or change it!)
Around half the time, exporting with the collada 1.4 exporter works just fine. The other half...it randomly divides out a few faces and assigns them to new texture space (the closest to tracking down any reason behind which faces it chooses I've come to is that sometimes, but only sometimes, when I merge edges, it glitches some of the faces to one side into a new texture space). This is NOT visible in Blender- it assigns texture faces just as you would expect, you only find out when uploading the collada and either the uploader fails because your models do not all have the same texture faces (or have too many- also note that you actually have to have all the _same_ textures assigned, not just the same number as well- or at least I do!), or you get it uploaded and find out you've got some straggler faces sprinkled around here and there that have a different texture face.
I've tried all sorts of ridiculous and time consuming experimentation with trying to track those down, fix them, replaced my collada exporting scripts with new versions, all to no avail. Finally I found one thing that actually fixed it: opening that blend file in Blender 2.5, and exporting in there.
BUT. The collada exporter in Blender 2.5 is twitchier. You MUST always make sure to tick the "export only selected" box in the file popup or it will export your entire blender scene with all pages in one piece (with my workflow, extra pages have the other LODs and collision and in progress working bits, so it's an enormous mess). ADDITIONALLY. IT ONLY SOMETIMES DOES NOT EXPORT THE UNSELECTED THINGS ANYWAY. This last go round, it would export around half of the rest of the stuff that had nothing to do with what I wanted to export, even though it wasn't selected! It was a consistent half, but it was not a helpful half.
So, time for making a copy of your blend file so you don't save over and lose everything. Open that in Blender 2.5. Delete everything on ALL the other pages. Delete everything you DO NOT NEED on the page with what you want to export. IF YOU ARE EXPORTING RIGGED MESH, DO NOT DELETE THE SKELETON. It needs that for the skeleton data. The body you're building around? All that can go, but not the skeleton itself. (And make sure it's the right skeleton if you've duplicated things for alternate working versions, of course.)
Last note: current version of the SL mesh uploader seems to require the collision object to have the same number of texture faces (and the same textures!) assigned as the LODs. Previous versions of the uploader did not, future versions may not again. There is no reason for collision to require textures assigned, and there is no helpful red error message, the button to calculate and upload just silently disables itself.
Saturday, May 21, 2011
Drowsy

Drowsy has been closed for a while, while they remodel. I'm always a bit sad when that happens to a good sim- often it's great, but it still means all those places that I used to love are gone. For now, Drowsy has just a little bit open, high in the sky, while they work below.

The island in the sky hasn't quite escaped the wolves, but there are far fewer wolves lurking around, and quite a few more cats!

Bits and pieces of the sim below have collected together in shards, the clocktower, the library, the swings from the playground, all collapsed together in a small space.

Only BP* and Kurotsubaki have reopened in the sky, with their signature beautiful little bits and pieces, tucked here and there around the library and the rest of the island.

There's a room with a projector and mementos of previous festivals, ephemeral memories of Drowsy past.

Visit Drowsy.
Subscribe to:
Posts (Atom)
